
False-alarm callbacks eat into your installation margin. With our Door Window Sensor G2, you can combine opening and adjustable tilt detection to protect suitable windows. Test the client’s ventilation position under the intended arming settings. Choose the angle and confirm the alarm response before sign-off.
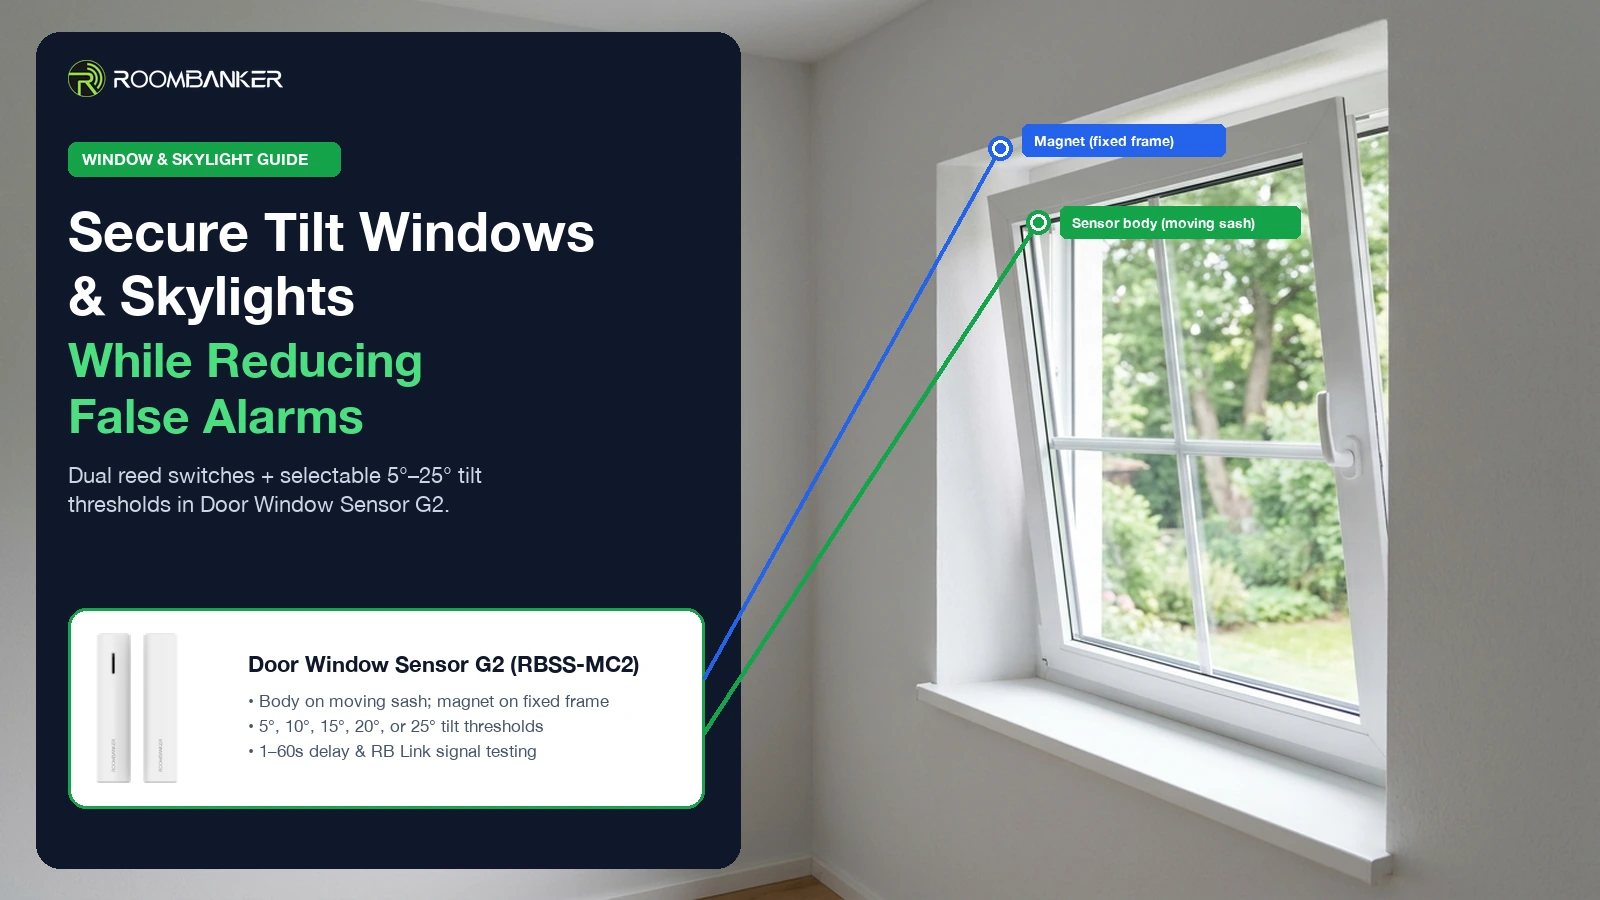
If you install alarms in a European office, a client opening a window for fresh air can mean another support call. Bypassing the whole window zone avoids that interruption but removes its alarm coverage. Our Door Window Sensor G2 (RBSS-MC2) combines opening and tilt detection in one indoor wireless device, giving you more ways to plan protection than a simple open/closed contact.
Why Standard Reed-Switch Sensors Can Cause Ventilation Callbacks
A reed switch detects the nearby magnet; it cannot tell why the sash moved. Tilting a window can separate the magnet far enough to trigger an opening alarm. For example, an office window that works perfectly when fully closed may report an opening every time staff tilt it for ventilation.
Your choice then affects both coverage and service costs. Leaving opening detection active can produce unwanted alarms during permitted ventilation; bypassing the zone removes that zone’s protection. Adding tilt detection gives you another event to work with, but you still need a tested plan for which opening and tilt events should raise an alarm.
How Dual Reed Switches and Selectable Tilt Thresholds Work in G2
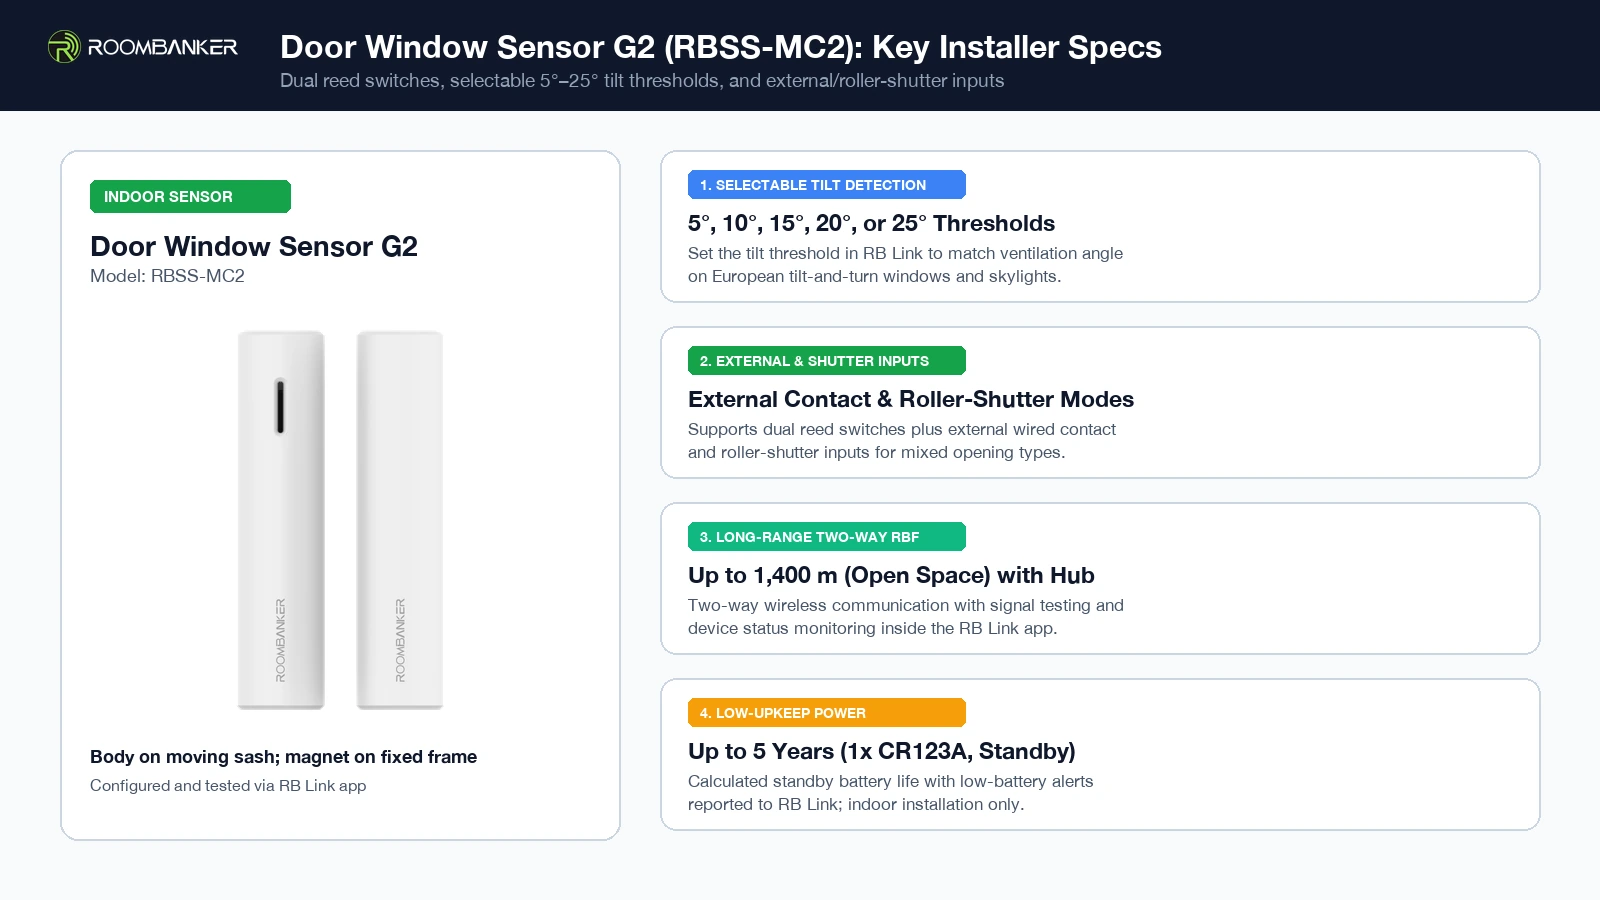
Our G2 has two reed switches for opening detection and five tilt thresholds: 5°, 10°, 15°, 20° and 25°. The selected threshold triggers tilt-event reporting; it does not automatically distinguish authorised ventilation from forced entry. Test both movements on the installed window. In RB Link, you also select a 1–60-second reporting delay: tilt must remain beyond the threshold for that time before reporting when armed.
For example, on a clinic window, compare the normal ventilation position with a larger opening before choosing a setting. Work with the magnetic contact response and the intended arming mode as well as the angle. Raising the tilt threshold will not silence a separate opening alarm from an enabled reed switch.
In RB Link, use the Opening Sensor switch to enable or disable opening detection; you can find the setting in our G2 setup guide (§4.19). Turning it off stops reed-switch messages and alarms while other enabled detection functions remain active. If you use that option for a ventilation arrangement, test which movements still trigger an alarm and explain the lost opening detection to your client. A forced opening that stays below the chosen tilt threshold may escape tilt detection.
External Contact and Roller Shutter Inputs: Choose for the Actual Device
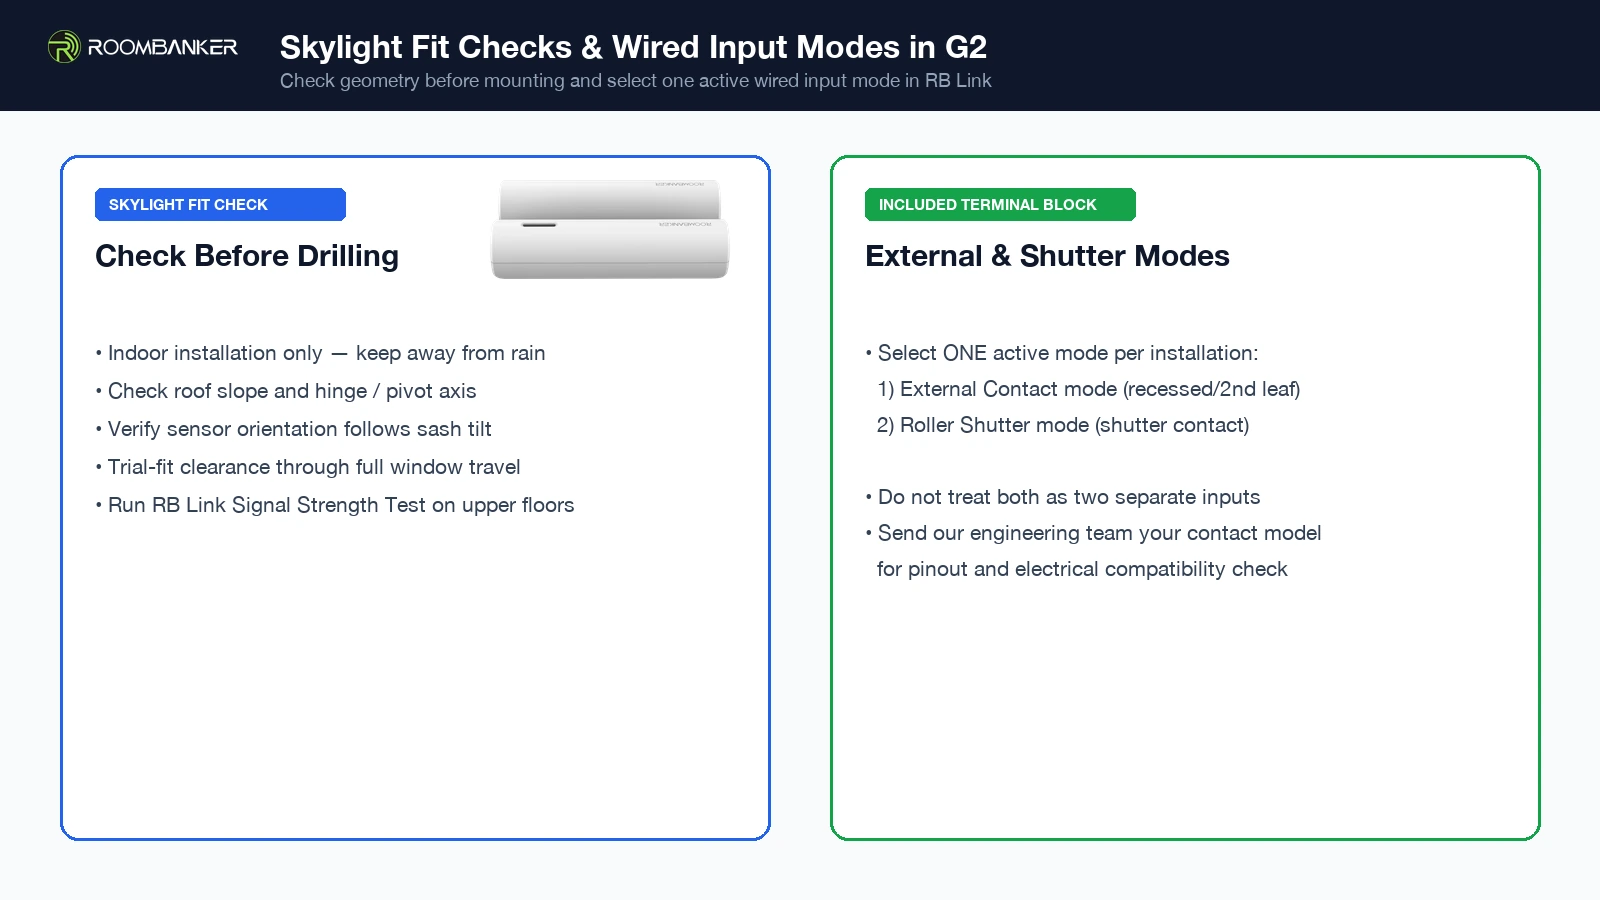
Our G2 supports External Contact and Roller Shutter input modes. Connect a compatible external detector through the supplied terminal; choose the mode for the connected device in RB Link. For instance, a bakery project might need an extra wired contact on one opening and a compatible shutter contact at its storefront.
In External Contact mode, a triggered external contact can raise an alarm when armed. In Roller Shutter mode, you set reporting time and impulse count—the number of pulses from the connected shutter contact needed to trigger reporting. This is a contact input, not a shutter-motor control connection.
Before wiring a recessed contact, a second window leaf or a shutter contact, send our engineering team the contact model and your proposed connection. We can help you check electrical compatibility, terminal pin assignments, contact circuit requirements and power arrangements for your project. Select the mode for that connection rather than treating External Contact and Roller Shutter modes as two independently available inputs.
Our two-way RBF radio links G2 with our Hub. G2 offers up to 1,400 m in open space with our Hub and uses one replaceable CR123A battery with up to 5 years calculated standby life, as detailed in our G2 specifications. Test the actual indoor signal at the mounting position and plan battery maintenance around usage.
Quick Setup Checklist in RB Link
Test the complete window arrangement before you leave the site. For example, on an upper-floor office skylight, a successful radio test says nothing about whether the installed orientation will distinguish the movements you need to detect.
- Check fit and mounting direction. Plan an indoor installation with the sensor on the moving sash so it follows the tilt, and the magnet on the fixed frame. Use the mounting arrangement and magnet spacing in our G2 installation guide before fixing either part. For a skylight, check its roof slope, hinge or pivot direction, sensor orientation and clearance through its full travel. Trial-fit and test that geometry before committing to the installation.
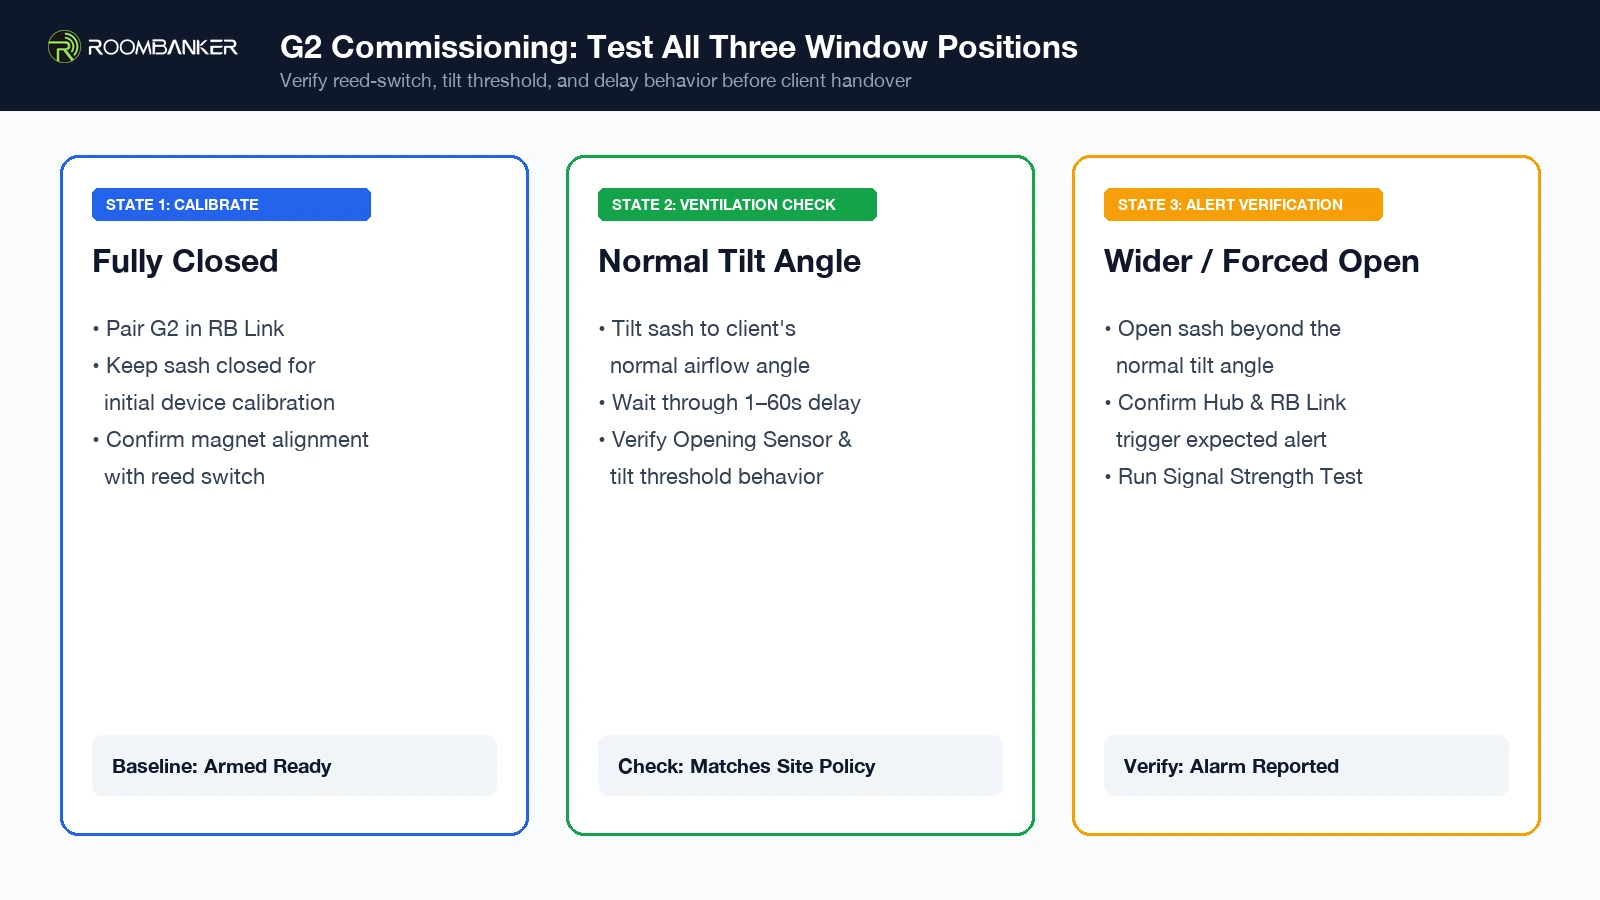
- Pair and calibrate. Add our G2 to our Hub in RB Link. Keep the window closed during device calibration, using the steps in our G2 setup guide.
- Choose the detection settings together. Select 5°, 10°, 15°, 20° or 25° and a reporting delay. Review Opening Sensor status, any external input mode, and the client’s intended arming mode together.
- Test every window state while armed in that mode. Start fully closed, move to the client’s normal ventilation tilt, then to a larger opening angle. Wait through the configured delay at each position and check the response in our Hub and RB Link. Test other available opening motions too, especially a pivoting skylight. Adjust and repeat until permitted ventilation and the movements requiring an alarm behave as agreed. If the arrangement cannot meet both needs, choose a different protection plan before sign-off.
- Test connections and explain use. Run Signal Strength Test at the final mounting position. Trigger any connected external or shutter contact and check its alarm response. Show your client the tested ventilation position and arming procedure so everyday use matches the installation you tested.
Frequently Asked Questions
Can I arm the system while a window is tilted for ventilation?
A tested configuration may support this. Check the reed-switch response, Opening Sensor setting, tilt threshold and intended arming mode on the actual window. Demonstrate normal ventilation and larger opening movements while armed before recommending that arrangement.
How do I choose the tilt threshold?
Compare the closed position, normal ventilation tilt and larger opening on your installed sensor. Choose from 5°, 10°, 15°, 20° or 25° in RB Link, set the reporting delay, then test the alarm response. Start from measured behaviour rather than assuming one angle suits every window.
Is G2 compatible with every skylight type?
No. G2 is an indoor sensor; skylight slope, pivot geometry, mounting space and sensor orientation need a fit check and practical test. Send our engineering team the skylight model and mounting photos so we can help you check suitability before you specify G2 across a project.
Protect Compatible Windows and Skylights with Flexible Detection
Our G2 can help reduce nuisance alarms when properly configured and tested. For an installer handling mixed windows and skylights, checking the actual opening movements before rollout can help avoid repeat visits that eat into project margin.
Send our engineering team your window or skylight models, mounting photos, Hub details and external contact requirements. Explore our G2 and discuss your installation, then request a sample or project quote to test your proposed setup before a wider rollout. For channel purchasing, apply to become a Roombanker installer or distributor.